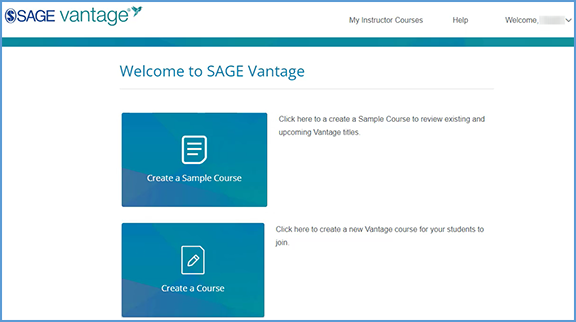
If you have never created a course in Vantage, the first time you login you can choose to Create a Course on the main page.
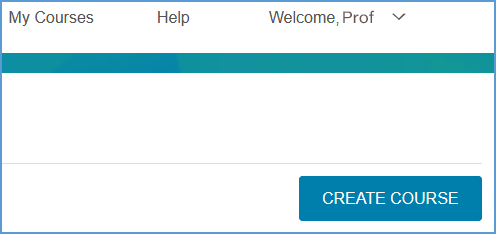
If you have created a course before, you can use the Create Course button at the top right of your My Courses dashboard to create a new course.
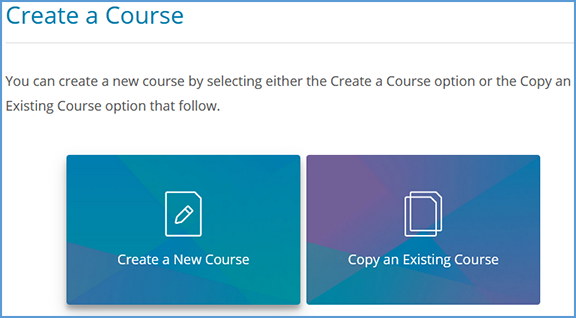
You will then have the option to Create a New Course or Copy an Existing Course.
 TIP: If you do not have at least one course in your account, the option to Copy an Existing Course will be greyed out.
Once you begin the course creation process, there are three sections that need to be completed:
1. Enter Course Information
2. Choose Gradebook and Assignment Settings
3. Review & Complete Course
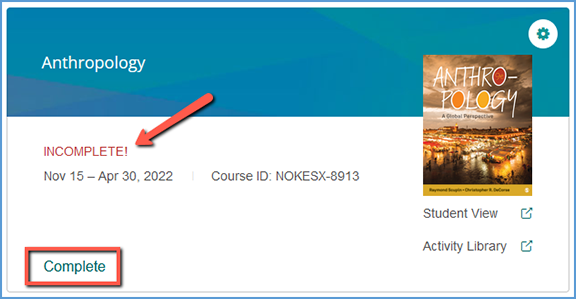
TIP: If you start the course creation process, but need to finish at a later time, Vantage will keep your progress. When you are ready to resume, visit your My Courses dashboard and locate the course tile. The status will show it is incomplete. Click Complete to pick up where you left off.
1. Enter Course Information
First fill in the course details. The information you enter here displays on your My Courses dashboard. Mandatory fields are marked with an asterisk.
1. Being by selecting an Institution and Department. If you do not see your institution or department in the dropdowns, follow the directions on the right of the page to update your information.

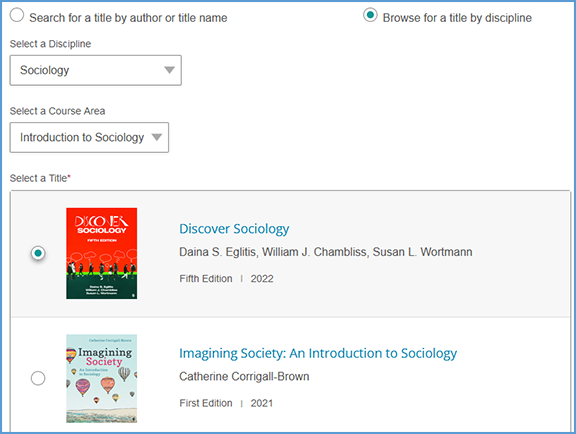
2. Locate the title you wish to use. There are two ways to find it.
You can start typing to search by author or title.
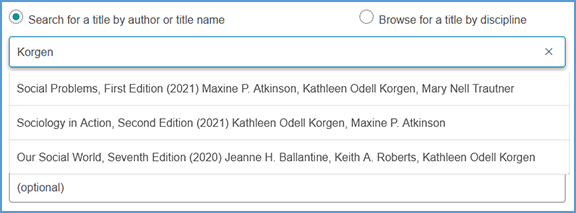
You can also search by discipline. Once you choose the discipline, you can further refine your search by choosing a Course Area. All titles available for the discipline and course area combination you select display. Choose your title from the list.
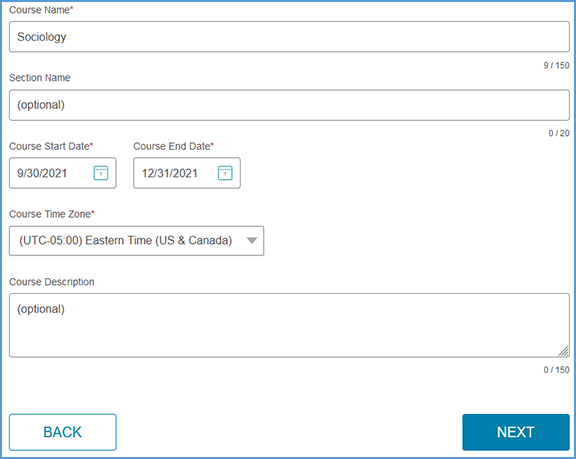
3. Complete the Course name, Section Name, Course Start and End dates, Time Zone, and Course Description fields. Section Name and Course Description are optional fields, but all other information is required.
TIP: Student access to the site is not based on the course dates. Their access is based on their registration date and will typically expire 180 days after their registration on the platform. In many cases, this means that students will be able to access the course after the end date you select.
4. Click Next once you complete your course details.
2. Gradebook and Assignment Settings
On this page, you will determine the default settings for your gradebook. You can also choose the initial settings for the various assignment types found in your course. The gradebook and assignment settings default to the most commonly selected options.
TIP: You are not limited to the assignment choices you make during the course creation process. You can make more granular changes to assignments after you create your course.
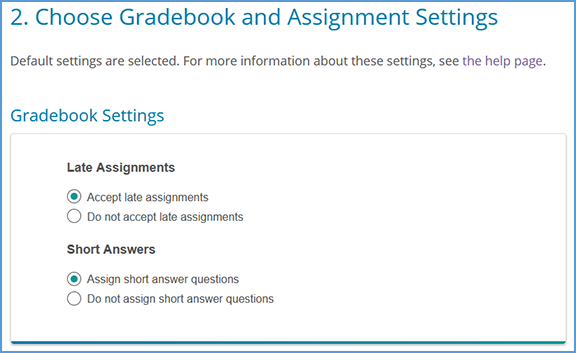
Gradebook Settings
You can choose if you want to accept late assignments in your course. Regardless of whether you accept late assignments, students can still complete an overdue assignment (up to the potential number of attempts allowed). This setting will determine what happens with a student's late submission in the gradebook.
If you accept late assignments, late submissions are recorded and flagged in your gradebook. If you do not accept late assignments, late submissions are flagged in your gradebook, but the grade is not recorded.
In this section, you can also choose to include short answer questions and Critical Thinking Checks if they are available in your course. These types of questions require students to write a brief paragraph.
Default settings:
· Accept late assignments
· Assign short answer questions and Critical Thinking Checks
Global Assignment Settings by Type
In this section, you can choose default settings for each assignment type for the course as a whole (global). You can make more granular changes to assignments after you create your course.
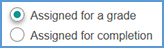
Each assignment type can be assigned for a grade or completion. When assigned for completion, the assignment is marked for whether the student completed it as opposed to for a grade which displays a point value.
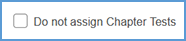
If there is a type of assignment you don't want to use in your course, you can choose not to assign them. By ticking the checkbox "Do not assign…", all assignments of that type will not be assigned. Students may still be able to access the assignment as they work through the text which many find useful as study aids.
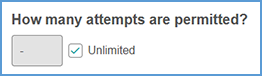
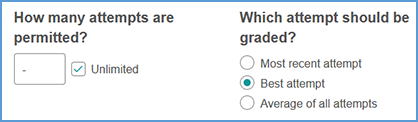
You can choose the number of attempts allowed for each assignment type. Assignments that are graded for completion are generally set to unlimited attempts. When assigning for a grade, some assignment types can be set to use a specific attempt: Most recent attempt, Best attempt, or the Average of all attempts.
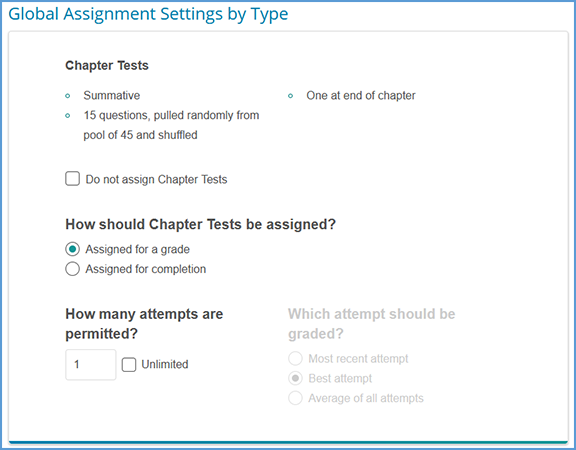
Chapter Tests
Chapter Tests are summative assessments at the end of each chapter. In addition to the settings described above, Chapter Tests also offer the option to allow students to review the test as a study aid.
Default Settings:
· Assigned for a grade
· One attempt
· Unlimited Chapter Test reviews
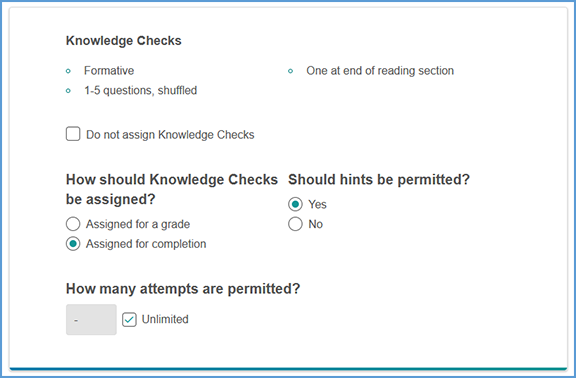
Knowledge Checks
Knowledge Checks are formative assessments that appear at the end of each section within a chapter. In addition to the settings described above, Hints can be enabled to help point students in the right direction.
Default Settings:
· Assigned for completion
· Hints are allowed
· Unlimited attempts
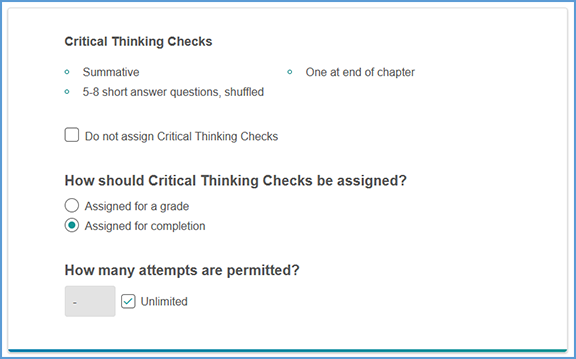
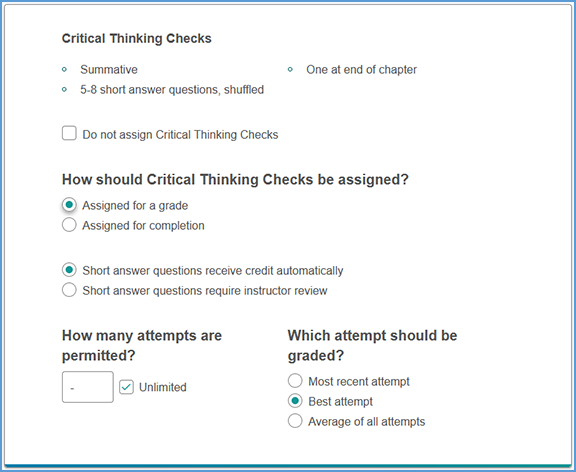
Critical Thinking Checks
Critical Thinking Checks are summative assessments at the end of each chapter. Students write a brief paragraph for each question.
TIP: If you chose not to assign short answer questions under the Gradebook Settings, you will not see the Critical Thinking Checks.
Default Settings:
· Assigned for completion
· Unlimited attempts
If you assign Critical Thinking Checks for a grade, you can choose to have students receive credit automatically or to review their responses.
TIP: If you choose to review their responses, students will not receive a grade until you review and accept their attempt.
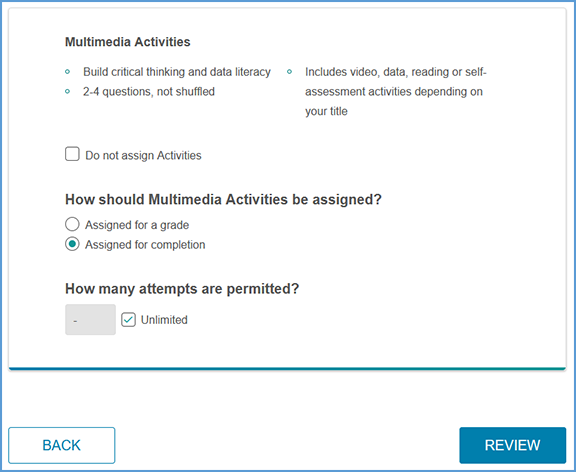
Multimedia Activities
Depending on your course, you may have one or more types of multimedia activities available.
TIP: If your course includes Self-Assessment Activities, they can only be assigned for completion.
Default Settings:
· Assigned for completion
· Unlimited attempts
Once you have finished with the default settings for your course, click Review to check your settings.
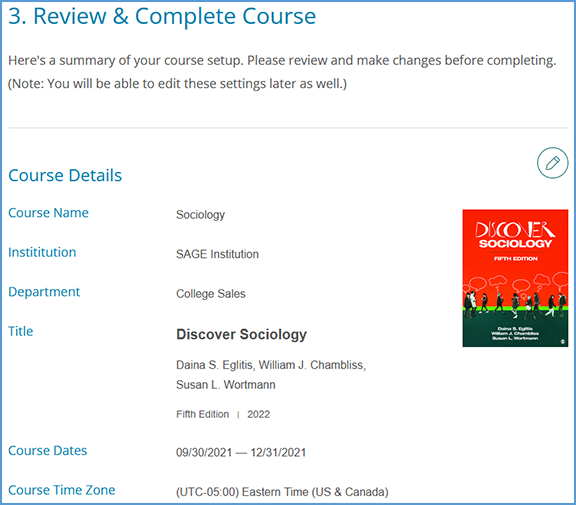
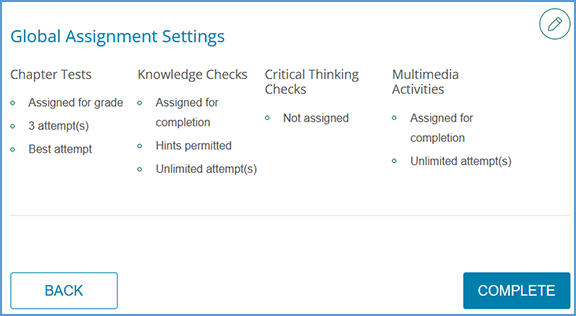
3. Review & Complete Course
The Review page is the last step before course creation. On this page, you can double check the settings you made for your course. If you need to change something, you can click the pencil icon to go back and edit that section. You can also go to the bottom of the page and click the Back button.
1. Review the Course Details. If you need to make changes, click the pencil icon to the right of this section.
2. Review the Gradebook Settings. If you need to make changes, click the pencil icon to the right of this section.

3. Review the Global Assignment Settings. If you need to make changes, click the pencil icon to the right of this section.
Once you are satisfied with your course settings, click Complete to finish creating your course.
You will see a new page that indicates "Your course has been created." You can click the respective Copy buttons to copy the course link or Course ID of your newly created course. You can then paste these details to wherever you want to store the information.
TIP: The course link is used only for courses that will NOT be integrated with an LMS. If you plan to pair your Vantage course with a course in your LMS (Blackboard, Canvas, D2L Brightspace or Moodle), this course link will not work to allow your students access to your Vantage course.
You can also click the Send button to email a copy of this information to yourself.
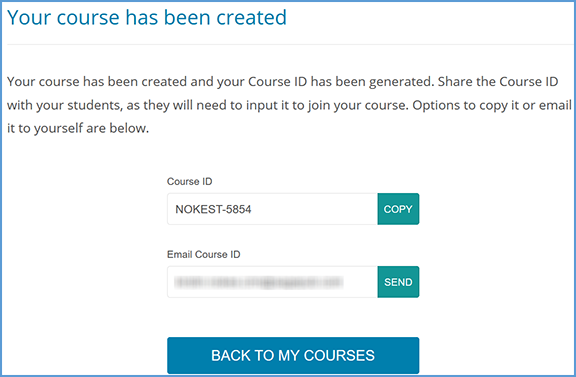
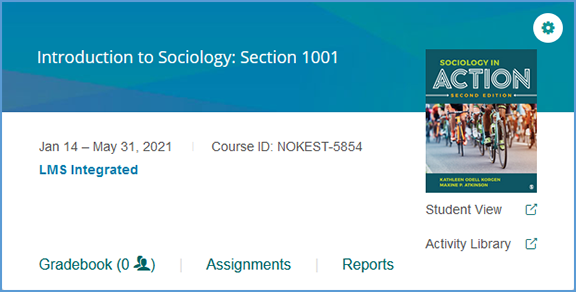
Once you are finished on this page, click Back to My Courses to return to your My Courses dashboard. You will now have a course tile for your course that shows the name, section information (if added), start and end dates, and the Course ID.