Question
| How do I configure the LTI 1.3 tool for Sage Vantage in Moodle? |
This document will walk Moodle administrators through the LTI 1.3 tool configuration to integrate Sage Vantage with Moodle. This tool will allow instructors the ability to create deep links and sync grades between Vantage and their Moodle courses.
Some configuration information is provided to you by Sage. Your Sage Technical Implementation Specialist will provide these details using a privnote link (https://privnote.com/). Please note that this link can be opened once. When you close the page, the contents of the privnote will be destroyed. Once you open the privnote, we recommend storing a copy of this information for your records.
- Log into your Moodle LMS as an Administrator. Next, go to Site Administration in the left navigation menu.

- On the Site Administration page, go to the Plugins tab.

- In the Activity Modules section, locate External tool. Click the Manage tools link immediately underneath it.

- Click the link to Configure a tool manually.

- You will be taken to the External Tool Configuration page. Complete the following fields as indicated:
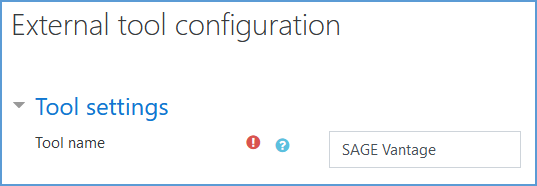
- Tool Name: Sage Vantage (* recommended)
- Tool URL: This URL will be provided by Sage. The description is helpful for instructors to know what the tool is used for, but Moodle does not require this field to be completed.

- LTI version: Set the dropdown to LTI 1.3.

- Public Key Type: Keyset URL

- Public keyset: The Keyset URL will be provided by Sage.

- Initiate login URL: https://vantage.sagepub.com/lti1p3/OidcLogin

- Redirection URI: The reply URL will be provided by Sage.

- Default launch container: Set the dropdown to New Window. Tick the checkbox for Content-Item Message.

- Content Selection URL: The content selection URL will be provided by Sage.

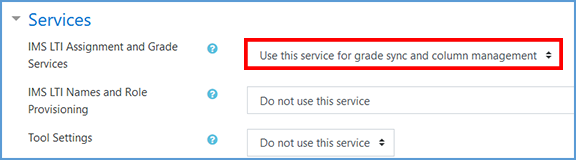
- Expand the Services section. Change the IMS LTI Assignment and Grade Services selection to "Use this service for grade sync and column management."
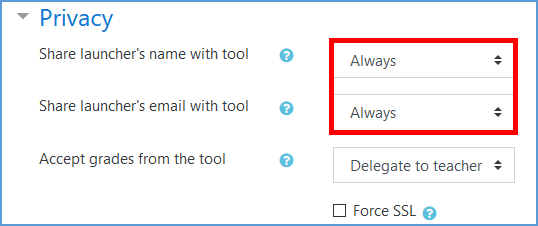
- Expand the Privacy section. Change the first and second options to Always.
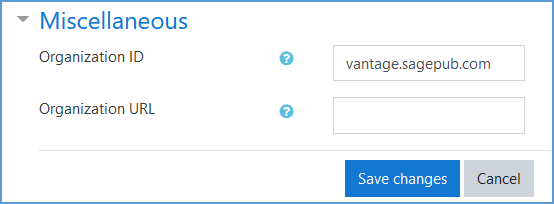
- Expand the Miscellaneous section and enter vantage.sagepub.com.
- Make a final review of the settings for accuracy. Next, click the Save Changes button to complete the tool setup.
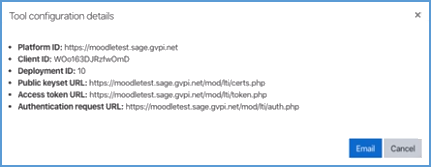
- After saving, open the tool's detail list by clicking the list icon.
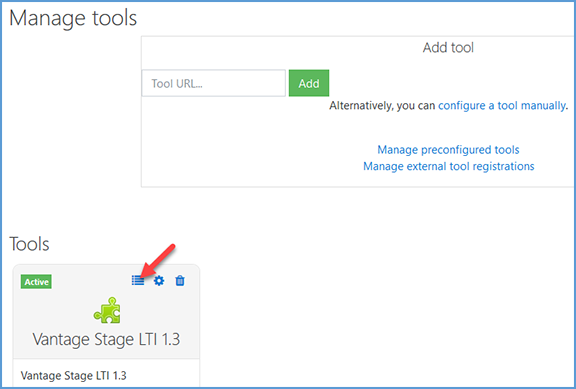
- Send the tool's configuration details to Sage to complete the tool set-up.
- After you send the Tool Configuration Details to your Sage Technical Implementation Specialist, you will receive confirmation that the integration is complete on the Sage side. We recommend that you attempt to add a link to Vantage in a sandbox course to confirm the tool configuration is working.
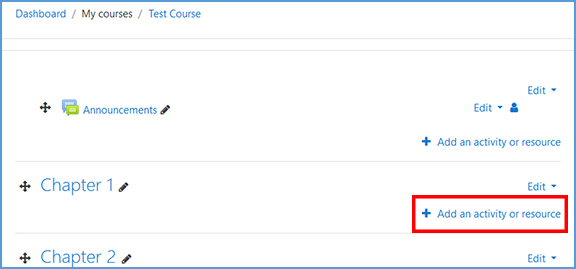
a. Go to the module you wish to add content to. Select the link to Add an activity or resource.
i. You may see Sage Vantage in your list of Activities. If not, select the External Tools link. Click the Add button.
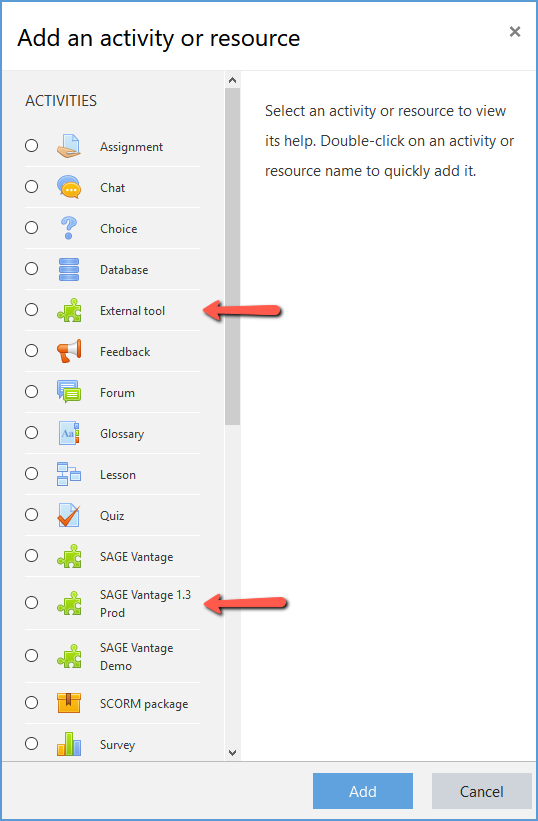
ii. If you had the Sage Vantage activity, click on the Select Content button. If you selected External Tools, choose Sage Vantage from the Preconfigured Tool dropdown and then click the Select Content button.

- You should see the following error message that you do not have a valid Vantage account:
"Message: Your learning management system email [your_email@school.edu] does not match an existing account in Sage Vantage. Please contact collegetechissues@sagepub.com so that our support team can create or merge your accounts."
![The 400 - BadRequest error reads: "Message: Your learning management system email [your_email@school.edu] does not match an existing account in Sage Vantage. Please contact collegetechissues@sagepub.com so that our support team can create or merge your accounts." It tells you that Vantage has authenticated and is looking for a valid instructor account rather than an Admin account.](https://sagevantage.softwareassist.com/Customizations/kbfiles/admin_images/image101.png)
Seeing this error indicates you have authenticated into Vantage to the point where it is doing a user check. Since the user check is looking for an instructor account, this message indicates the configuration is correct. |
|
|