Question
| How do I configure the LTI 1.3 tool for Sage Vantage in D2L Brightspace? |
This document will walk D2L administrators through the LTI 1.3 tool configuration to integrate Sage Vantage with D2L. This tool will allow instructors the ability to create deep links and sync grades between Vantage and their D2L courses.
Some configuration information is provided to you by Sage. Your Sage Technical Implementation Specialist will provide these details using a privnote link (https://privnote.com/). Please note that this link can be opened once. When you close the page, the contents of the privnote will be destroyed. Once you open the privnote, we recommend storing a copy of this information for your records.
- Before you begin, verify that LTI Advantage permissions are enabled.
a. Click the gear icon to open the tools menu. Locate the "Security" section and click Roles and Permissions. You may need to scroll down through the available features to see it.
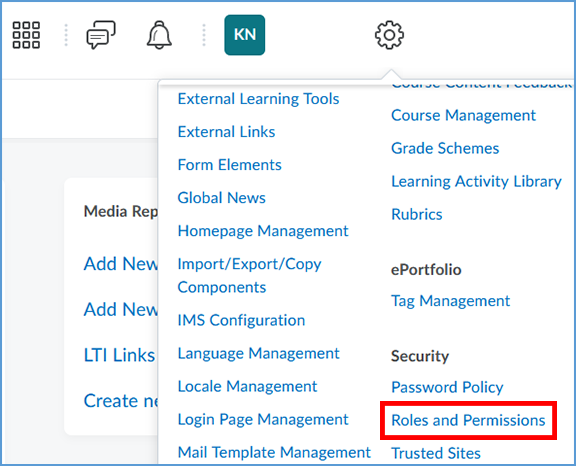
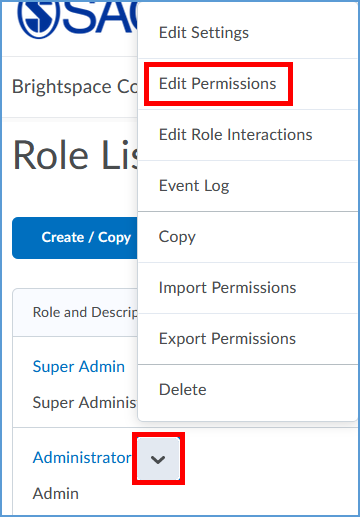
- Open the context menu next to Administrator. From the menu, select Edit Permissions.
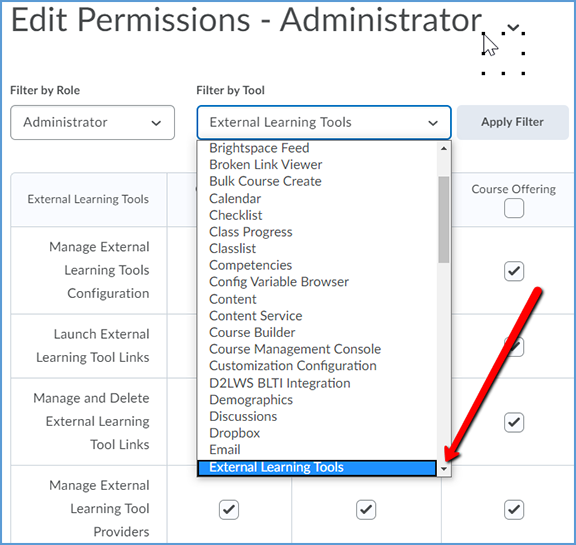
c. In the Filter by Tool dropdown list, select External Learning Tools.
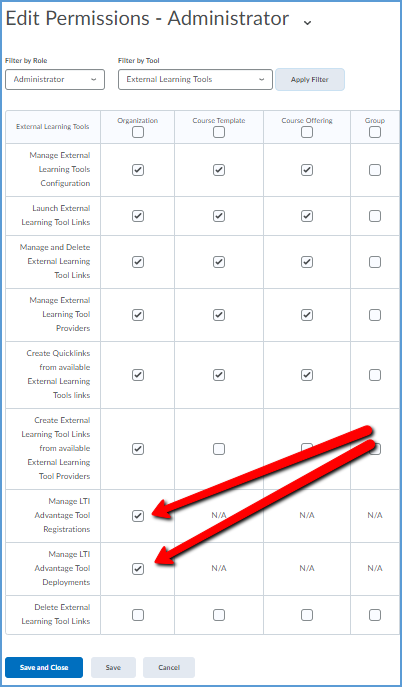
d. Tick the checkboxes for Manage LTI Advantage Tool Registrations and Manage LTI Advantage Tool Deployments. Next, click Save and Close to complete.
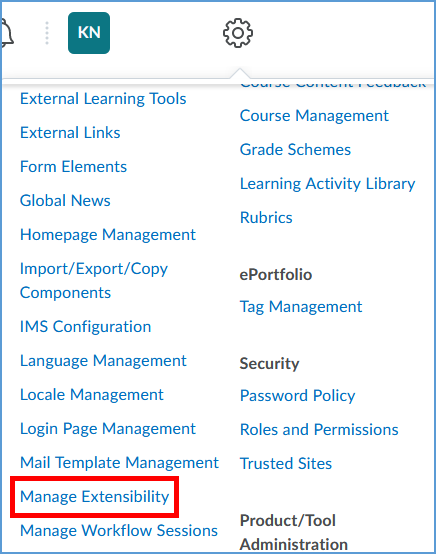
- Once you have verified the permissions, click the gear icon in the upper-right corner of the page to open the tools menu.

- Locate the "Organization Related" section and click Manage Extensibility. You may need to scroll down through the available features to see it.
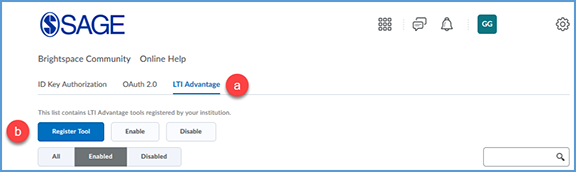
- Click the link for LTI Advantage (a) followed by the Register Tool button (b).
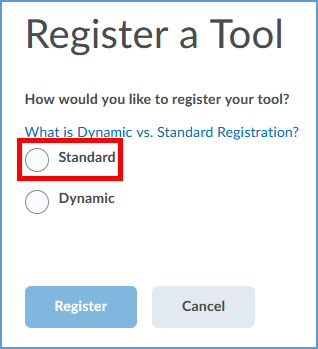
- When prompted whether to register the tool as Standard or Dynamic, choose Standard.
- On the Register a Tool page, complete the following fields as indicated:
- Name: Sage Vantage
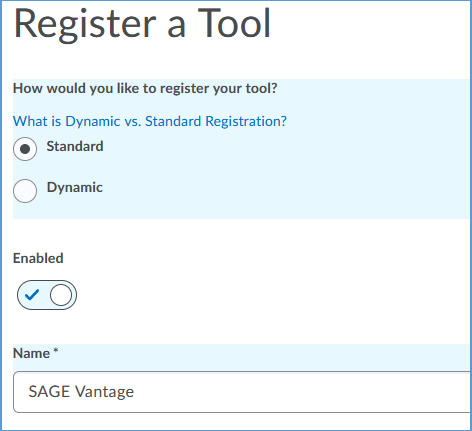
- Description: This can be the same as the Name.

- Domain: https://vantage.sagepub.com

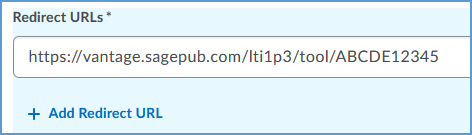
- Redirect URL: The Redirect URL will be provided by Sage.
- OpenId Connect Login URL: https://vantage.sagepub.com/lti1p3/OidcLogin

- Keyset URL: The Keyset URL will be provided by Sage.

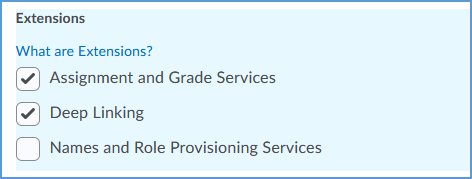
- Extensions: Tick the checkboxes for Assignment and Grade Services and Deep Linking.
- Make a final review of the settings for accuracy, then click the Register button.
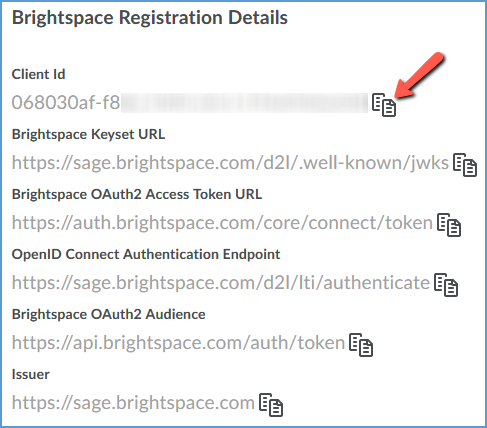
- Saving the Registration will provide a list of Registration Details. Use the copy icon to Copy each of these items. Send this information back to Sage.
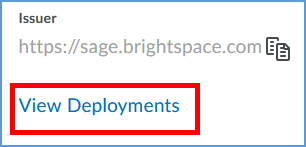
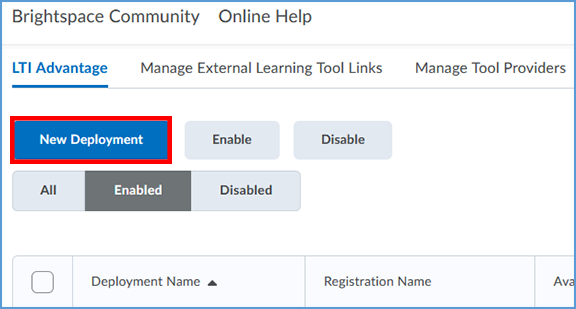
- Once you have copied each of the items in the list, click the View Deployments button.
- Click the New Deployment button.
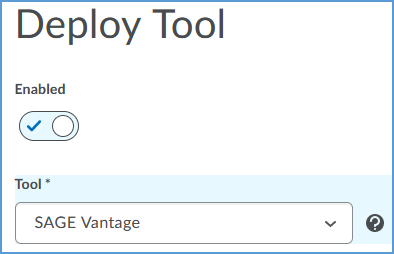
- On the Deploy Tool page, complete the following items:
- Tool: In the dropdown, select the LTI tool you created in previous steps.
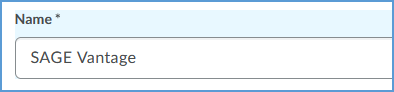
- Name: Sage Vantage
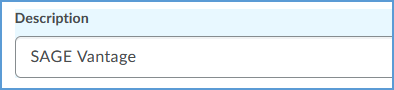
- Description: This can be the same as the Name.
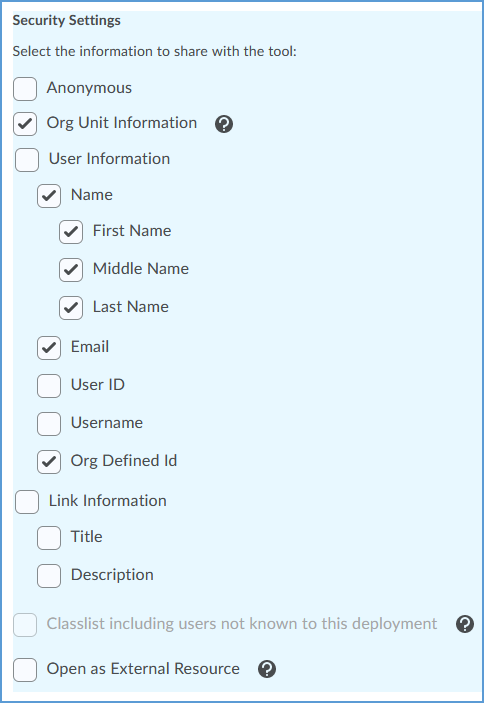
- Security Settings:
- Tick the checkboxes for Org Unit Information and User Information.
- Under User Information, clear the checkboxes for User ID and Username.
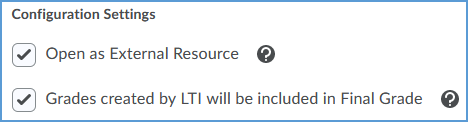
- Configuration Settings:
- Tick the checkboxes for Open as External Resource and Grades created by LTI will be included in Final Grade.
- Make tool available to: Click Add Org Units to select the global organization to allow this tool to be used in any course. Individual courses can also be selected if desired.
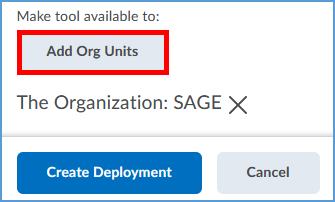
Note: Depending on how your Org Units are divided for your school, you may need to add more than one organizational unit if you have instructors in multiple departments who need access to the tool.
- Make a final review of the settings for accuracy, then click the Create Deployment button.
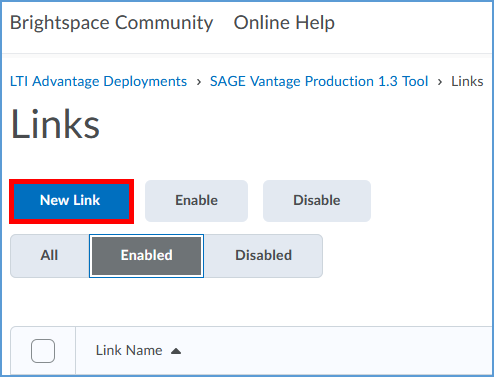
- In the confirmation box, click View Links.
- Click the New Link button.
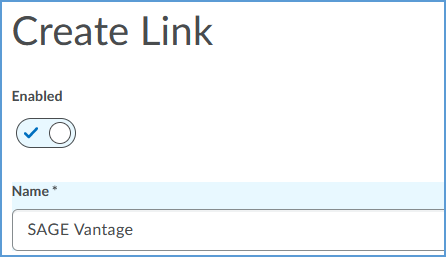
- On the Create Link page, complete the following items:
- Name: Sage Vantage
- URL: The URL is the Redirect URL provided by Sage. This is the same URL you used in Step 6d above.

- Description: This can be the same as the Name.

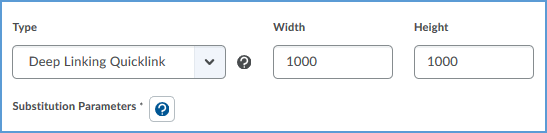
- Type: Set the dropdown to Deep Linking Quicklink. Set both the Width and Height options to 1000.
- Click the Save and Close button when finished.
- After you send the Registration Details to your Sage Technical Implementation Specialist, you will receive confirmation that the integration is complete on the Sage side. We recommend that you attempt to add a link to Vantage in a sandbox course to confirm the tool configuration is working.
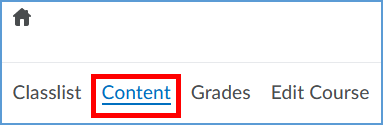
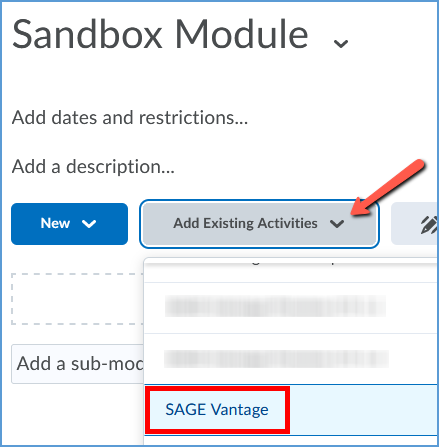
- In your sandbox course, click Content in the top navigation menu.
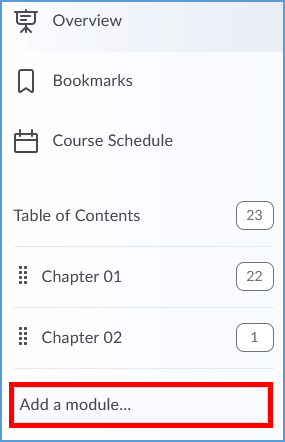
- If necessary, click Add a module in the left menu to create a content area to work in.
- Click Add Existing Activities, then choose the Sage Vantage tool.
- You should see the following error message that you do not have a valid Vantage account:
"Message: Your learning management system email [your_email@school.edu] does not match an existing account in Sage Vantage. Please contact collegetechissues@sagepub.com so that our support team can create or merge your accounts."
![The 400 - BadRequest error reads: "Message: Your learning management system email [your_email@school.edu] does not match an existing account in Sage Vantage. Please contact collegetechissues@sagepub.com so that our support team can create or merge your accounts." It tells you that Vantage has authenticated and is looking for a valid instructor account rather than an Admin account.](https://sagevantage.softwareassist.com/Customizations/kbfiles/admin_images/image101.png)
Seeing this error indicates you have authenticated into Vantage to the point where it is doing a user check. Since the user check is looking for an instructor account, this message indicates the configuration is correct. |
|
|